After you install
After you complete the install you now have to setup your notification channels to point to the service. You can do this one at a time or all at once.
- Install the Enhanced Notification Service for SCOM on the rest of your SCOM notification servers if you are not using the Standalone install.
- Copy the license.lic file into the install directory on each server you installed Enhanced Notification Service for SCOM. Default is C:Program FilesLissProductionsEnhancedNotificationServiceforSCOM. Replace any existing license.lic file with the current one.
- Verify your System Center Data Access Service (OMSDK) Service is started.
- Launch the Enhanced Notification Service for SCOM from Services.mmc
For new installations – you will need to copy over the license.lic file into the install directory. Then start the service from services.msc.
For upgrades – you can just click OK. The license.lic file will not be removed during an upgrade. Then start the service from services.msc
5. Create or modify existing Notification channel(s) to deliver notifications via SMTP to Enhanced Notification Service for SCOM.
Create your notification channels, one of two ways.
Via the Operations Manager (power)shell or Operations Manager Console.
Create the Notification Channel(s) via Powershell
Management Notification Server install Single or multiple server scenarios (with the SCOM notification role installed) use localhost
Add-SCOMNotificationChannel -Name "Enhanced.Notification.Service.for.SCOM" -From "[email protected]" -Server "localhost" -Anonymous -Subject "`$Data[Default='Not Present']/Context/DataItem/AlertId`$;`$MPElement`$" -Body "`$Data[Default='Not Present']/Context/DataItem/AlertOwner`$"
Standalone install: use DNS FQDN where the Enhanced Notification Service for SCOM Service is installed. This is where SCOM will deliver the messages to the Enhanced Notification Service for SCOM
Add-SCOMNotificationChannel -Name "Enhanced.Notification.Service.for.SCOM" -From "[email protected]" -Server "FQDN of your host" -Anonymous -Subject "`$Data[Default='Not Present']/Context/DataItem/AlertId`$;`$MPElement`$" -Body "`$Data[Default='Not Present']/Context/DataItem/AlertOwner`$"
Create the Notification Channel(s) via Operations Manager Console
Go to Administration -> Channels
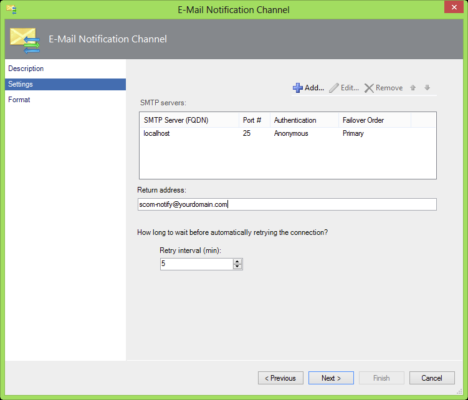
Add or Modify the SMTP Channel. Next

Point the notification channel to the Enhanced Notification Service for SCOM.
Management Notification Server install Single or multiple server scenarios use localhost.
Standalone install: use DNS FQDN where ENS for SCOM is installed. This is where SCOM will deliver the messages to ENS for SCOM
Set the Notification Return Address. Click Next

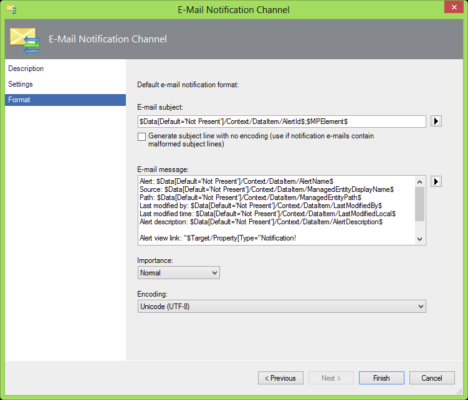
Modify the e-mail subject to:
$Data[Default='Not Present']/Context/DataItem/AlertId$;$MPElement$
Click Finished
(note the ’email message’ below is not used and can be remove if wanted)
Test your notification channel by changing an alert to a new state. (From New -> Acknowledged)